At Zapier, we’re huge proponents of collaborating asynchronously. But that doesn’t mean relying only on text-based communications, like an email or Slack message. Another effective way to update our teammates is through video. Whether it’s an exec announcing a new strategy or a colleague sharing a project update, video is a more personal way to do it—you just have to know how to record a video on your device.
Here, I’ll show you how to record a video on a Mac (we all use MacBooks at Zapier), along with a few tips for looking and sounding your best.
Table of contents:
How to record a video on a Mac
There are plenty of third-party apps you can use to record yourself on a Mac, but the easiest way is to use QuickTime Player. Every Mac comes pre-installed with it, so there’s no barrier to entry. Here’s how to use it.
-
Open Finder.
-
Click Applications, and then select QuickTime Player.

-
In the menu bar at the top of your screen, click File, and then select New Movie Recording. If you want to record your screen, click New Screen Recording.

-
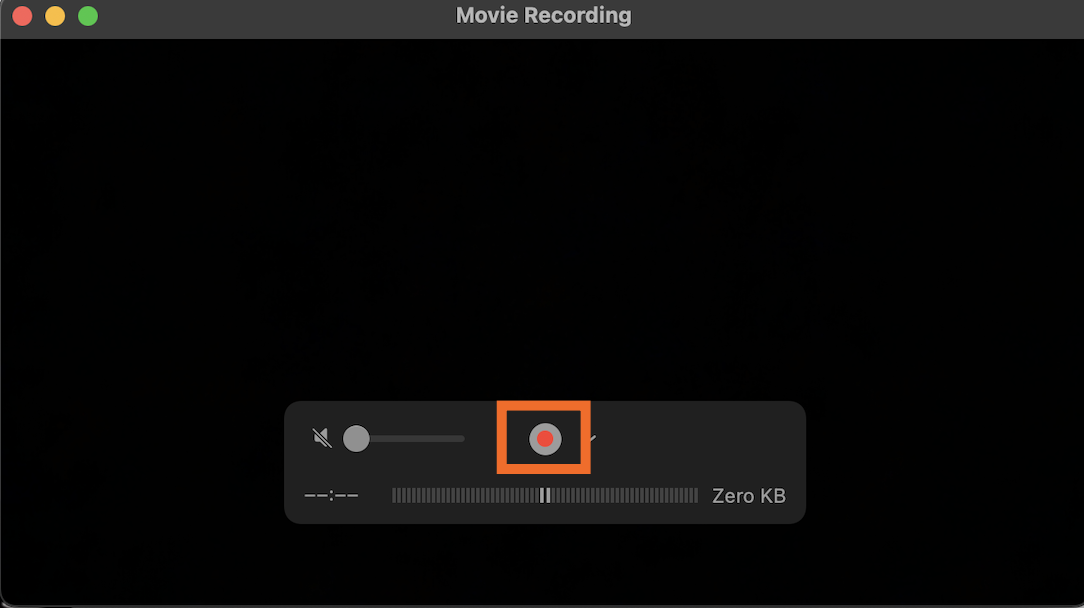
Click the Record icon to begin recording. (Click it again to stop recording.)
-
If you want to change your camera or microphone, or the quality of your recording, click the down caret (
⋁) next to the record button, and update your settings. -
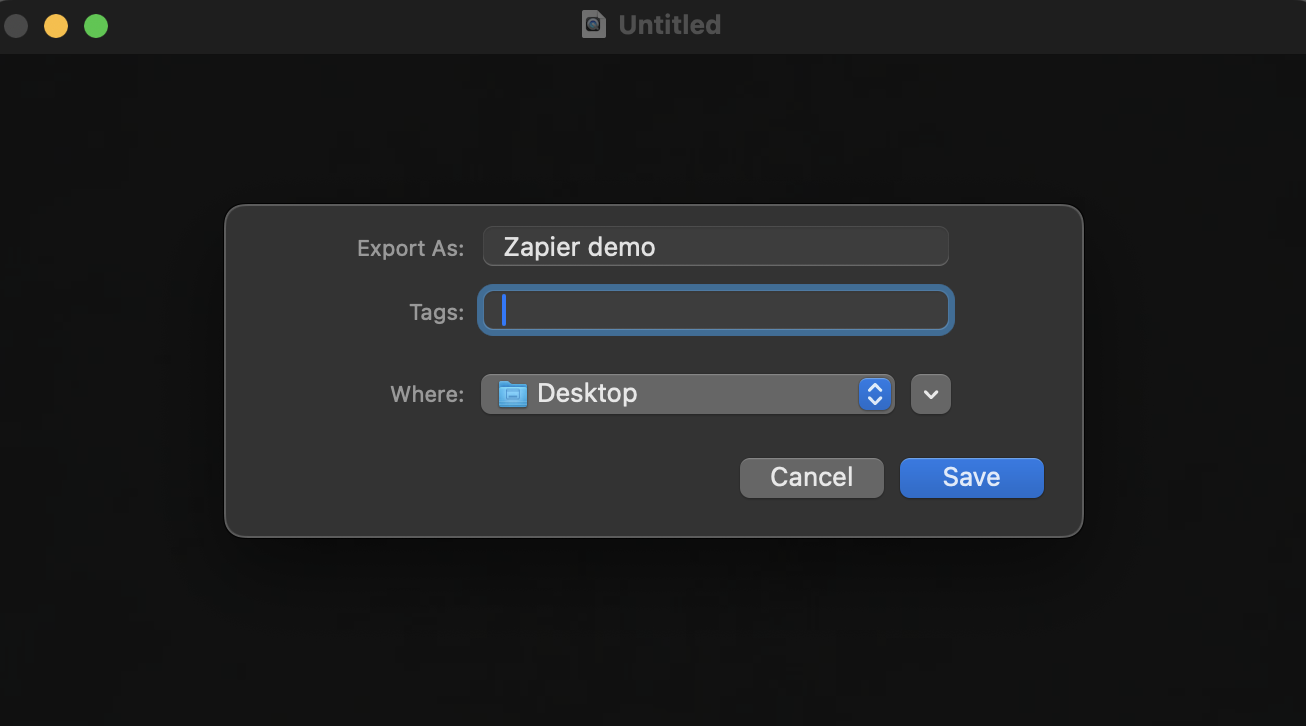
In the menu bar at the top of your screen, click File, and then select Save. Or you can use your keyboard shortcut.
-
Name your file, select where to save it, and click Save.


Just like that, you’ve recorded a video. Here’s what it looks like in action.
3 tips for video recording yourself
I’ve filmed a lot of videos at Zapier. Here are my three main tips for video recording yourself, so you can look and sound your best.
1. Framing
No matter what kind of camera you’re using—your laptop’s webcam included—make sure you’re properly in the video frame. This means that you’re centered in the video with the middle of your chest and the top of your head visible. You’ll also want to leave some space above the top of your head, so the frame doesn’t feel too tight or cluttered.
Try to get the camera level with your eyes—this way you aren’t looking up or down at the camera. It also helps to give the recording a more natural feeling. As long as you look directly into the camera, when someone watches the video, it feels like you’re talking directly to them, making virtual eye contact.
2. Lighting
When it comes to lighting, there’s a fairly simple rule: keep the light in front of you. If the light source is behind you, you’ll be dark and hard to see (you’ve probably heard the word “backlit” before). Since you’re the focus here, you want to be sure people can see you.
You don’t need a fancy LED ring light (although if you have one, use it!). All you need is a good light source, like a window with natural light pouring through or a lamp.
The key is to try to make sure your face is lit as evenly as possible. You don’t want one side of your face in heavy shadow and the other in bright light that washes out your features. To accomplish this, bounce a lamp light off a wall directly in front of you and adjust window blinds, so they’re giving off a roughly even light.
3. Microphone
You can get an external mic (think: Blue Yeti USB mic), but you don’t really need one. Macs have decent built-in mics, and as long as you add some extra oomph to your volume and enunciate, you’ll be fine.
If you do have an external mic, place something soft and cushiony directly behind it to help absorb sound and cut down on echoes and reverb. Different mics also recommend different angles of approach. In most cases, you don’t want to speak directly into the mic, but just past it or at an angle.
I’d recommend searching for “[your mic] best techniques” and watching a demo video or two to understand the best way to approach the mic.
Automatically share your video recordings
Let me guess: after you record a video to share with your team, first you upload it to the cloud, then you patiently wait for it to finish uploading before you can share a link to the file. Sound about right?
Instead of waiting for what can sometimes feel like an eternity for that link, use Zapier to connect your cloud storage app with your go-to team chat apps, so you can automate the notification process. Here are a few pre-made templates to get you started.
Zapier is the most connected AI orchestration platform—integrating with thousands of apps from partners like Google, Salesforce, and Microsoft. Use interfaces, data tables, and logic to build secure, automated, AI-powered systems for your business-critical workflows across your organization’s technology stack. Learn more.
Related reading:
This article was originally published in December 2021. The most recent full update was in October 2023, and the article was fact-checked and lightly updated in June 2025.