Slack bots are handy robot assistants that hang out in Slack, wait for commands, then find or create the thing you need. And you can whip up a Slackbot in just a few minutes.
How hard will it be? Well, depends on the type of bot you need:
-
Reply bots respond when someone posts a specific phrase in Slack. They’re perfect for automatically answering frequently asked questions. These are the easiest of the three bots to build.
-
Notification bots monitor activity in other apps and send updates to Slack. They keep you informed of changes, so you don’t need to switch between apps. These are fairly easy to build.
-
Slash command bots are triggered by a command beginning with a slash (like
/giphy, which triggers a bot that finds animated GIFs). You can create similar bots that look up or create things in other apps. These are a little trickier to build.
In this post, we’ll walk you through how to make all three—without writing a single line of code.
Zapier is the most connected AI orchestration platform—integrating with thousands of apps from partners like Google, Salesforce, and Microsoft. Use interfaces, data tables, and logic to build secure, automated, AI-powered systems for your business-critical workflows across your organization’s technology stack. Learn more.
Table of contents
How to build a Slack reply bot
Reply bots constantly watch your Slack channels and respond when specific phrases are mentioned. And they can save your team time by answering questions that pop up time and again.
There are two ways to make them: in Slack or with Zapier. Slack’s built-in option is faster to set up, but a Zapier-powered bot is way more customizable.
How to build a simple Slack reply bot using Slackbot
You can create a Slackbot right in your Slack settings. Go to the Customize Your Workspace page, add a phrase for the Slackbot to watch for, then tell it how to respond.
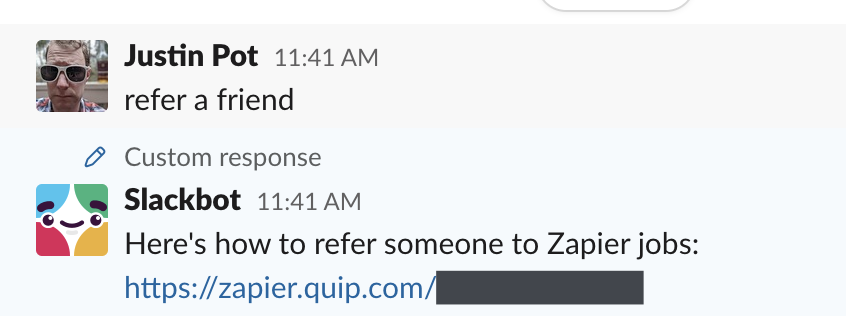
Here at Zapier, for example, employees often ask how to refer their friends for open roles. So we made a Slackbot that answers this question automatically.

Note that you can add as many trigger phrases as you want—just separate them with commas, as shown above. Here’s how it looks when someone uses one of those phrases:

This saves our recruiting team from having to constantly answer the same question. It’s quick to set up and works in every Slack channel.
The downside? This tool is rather limited, since it can only post the same response every time. What if you want a customized response each time? What if you want the bot to have a custom name, its own icon?
That’s when a Zapier Slack bot comes in handy.
How to build a Zapier Slack reply bot
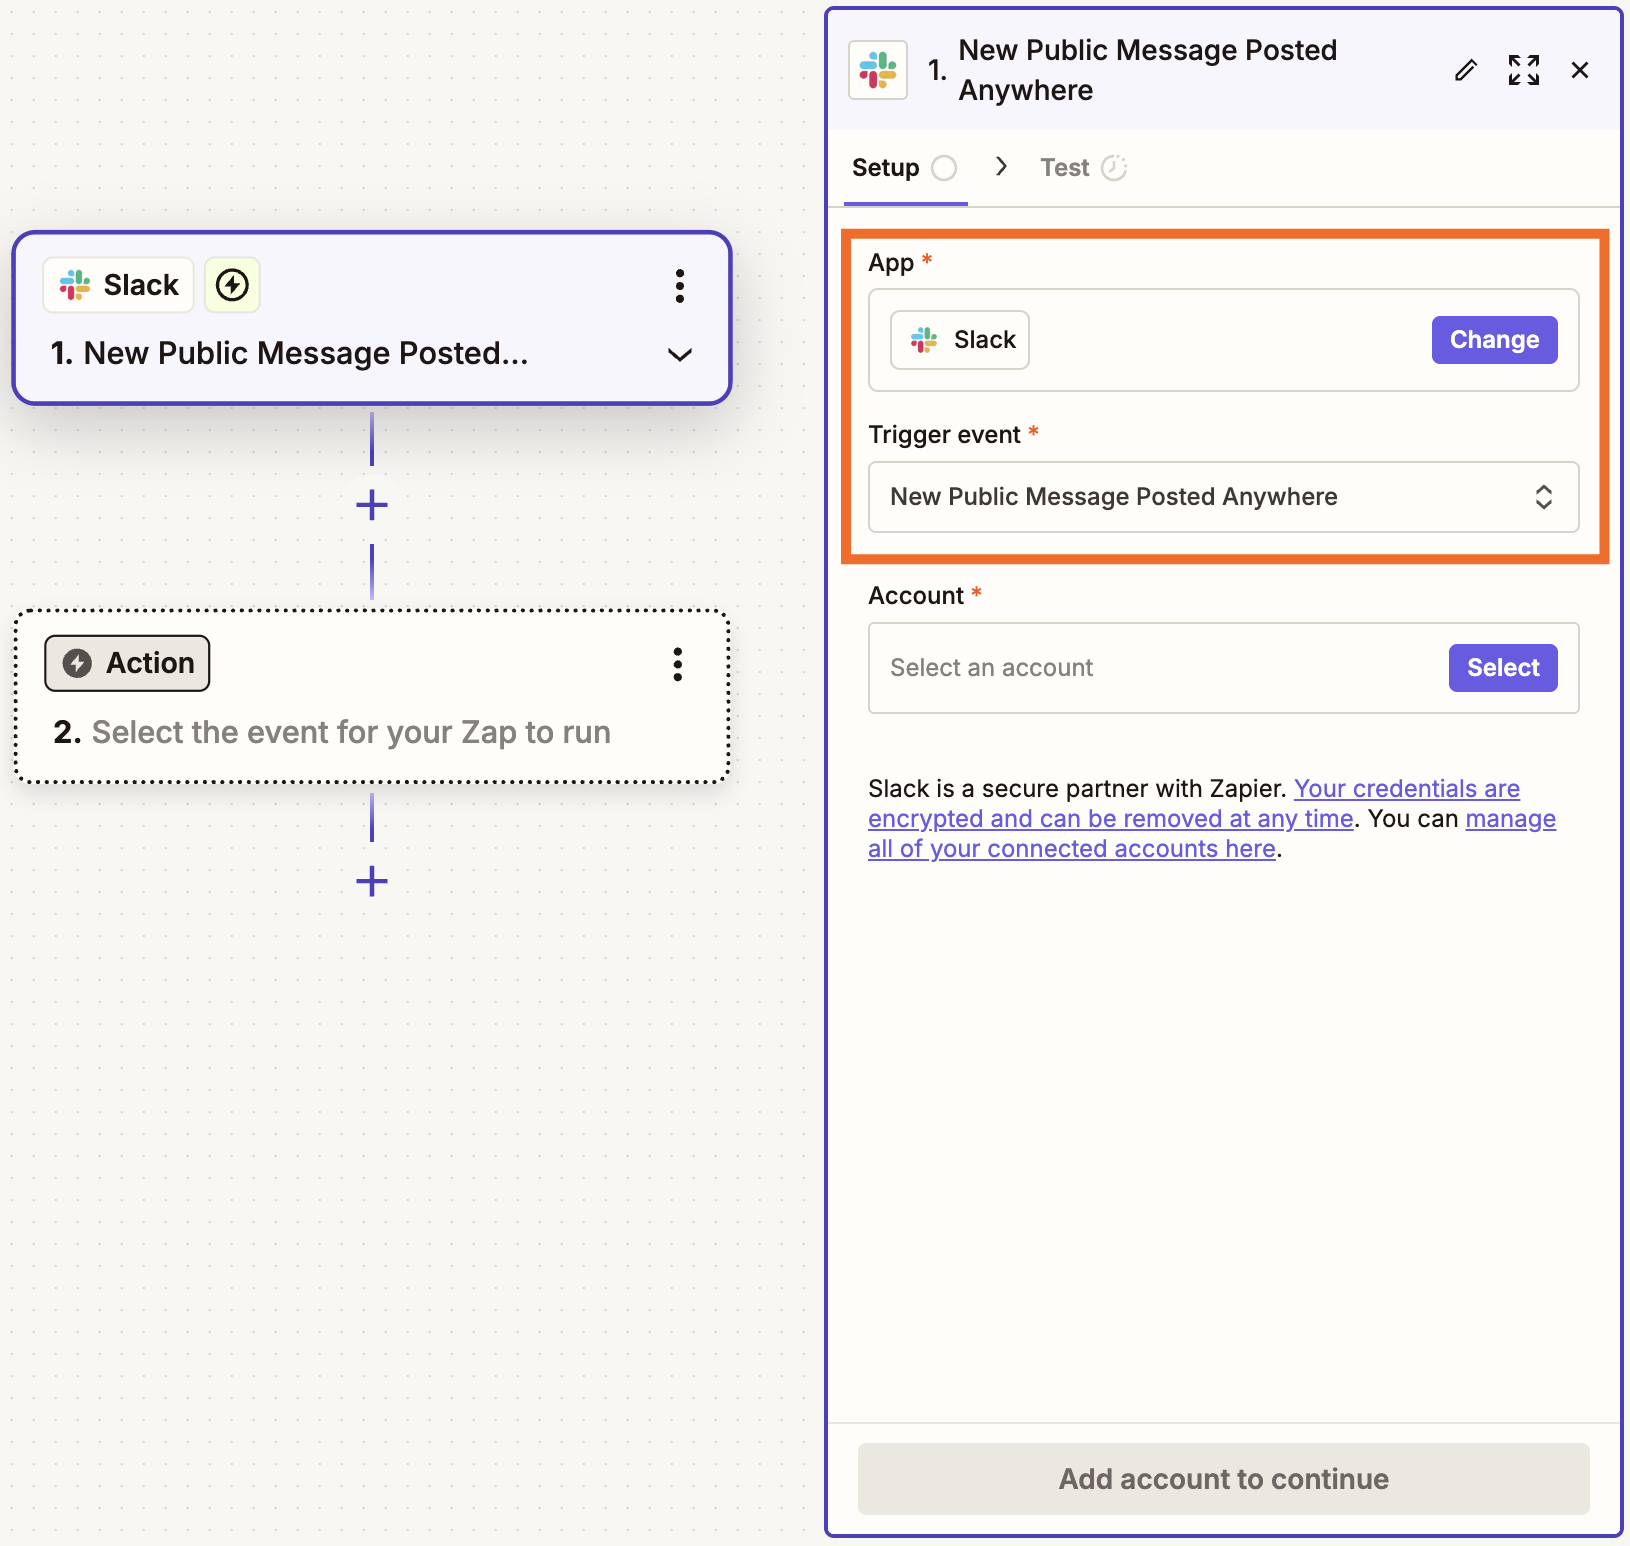
First, create a Zapier account or log in to your existing account. Then head to the Zap editor. Select Slack as your trigger app, and under Trigger event in the Setup tab, choose New Public Message Posted Anywhere. (Or, if you want this bot to work in only one channel, select New Message Posted to Channel.)

Next, connect your Slack account to Zapier by clicking +Select. Once you’ve connected your account, select it from the dropdown menu and click Continue.
You’ll then be asked two questions:
-
Whether you want your trigger to apply to bot messages (since you’re creating a bot yourself, choose No)
-
Whether you want to “optimize” the data set—in most cases, choose yes to help avoid API limits
After you make your selections, click Continue.
Click Test trigger to make sure it’s working, then Continue.
Next, set up your first action: this will be a filter that watches for a specific term—otherwise, your bot will run every time anything is posted to Slack. So for your action app, choose Filter by Zapier.

In the Configure & test tab, set your filter to continue the Zap only if the Text field matches a certain term.
If you want the bot to run whenever your chosen term is posted to Slack, then set the filter to (Text) Contains. If you want it to only run when it sees that specific phrase on its own, have set it to (Text) Exactly matches. Then, in the third field, type the words you want the bot to watch for.

Your next and final step involves setting up the Slack reply. Add another step to your Zap, then select Slack as your app and Send Channel Message as your action event.
In the Channel field, decide where the reply should appear. If your trigger is New Public Message Posted Anywhere, click the kebab menu (⋮) to the right of the field and choose Custom—then map that to the channel from your trigger. (You can map data from previous steps by clicking the + sign or typing a forward slash (/), which opens a modal that lets you select and insert values.)

If, however, your trigger is for a specific channel, choose Static from the kebab menu and pick that same channel.
In the Message Text field, write what you want to post. You can even tag the person who sent the original message.
At this point, you can configure other optional settings—like adding a name and icon to your bot. When everything looks good, click Continue, test your step, then turn on and publish your Zap.

So far, this is pretty similar to Slackbot—but with a little more flexibility, thanks to the filter capabilities.
But what if you’ve got your eye set on even more customization? You’ll want to use Formatter by Zapier. It’s a built-in Zapier tool that lets you change text to look exactly the way you want, calculate values, choose random values from a list, and more. (Read more details in our Formatter feature guide.)
For the purposes of this post, let’s say you want to make a birthday bot that sends a random GIF from a list whenever someone says “Happy birthday!” Make sure your filter watches for that phrase. Then, all you need to do is to add a Formatter step that whips up a random GIF.
To do this, add a new step right before your final Slack step. Pick Formatter as the app and Utilities as the Action event.
In the Configure tab, choose Pick from list in the Transform field and Choose Random as your Operation. Finally, gather your desired GIF links and enter them as separate values under Input.

Your final Slack action will stay mostly the same—but in the Message Text, map the field to the GIF you entered in the previous step.

Click Continue. Then just remember to publish your Zap. Now, the next time someone says “happy birthday,” they’ll get surprised with one of your GIFs.
How to build a Slack notification bot
A notification bot sends Slack updates when something happens in another app. To build this, pick an app you want to track. Zapier can automatically post the updates to Slack for you.
Say you want a Slack ping whenever new tasks are added to a Trello board. First create a new Zap and select Trello as your trigger app. For your trigger event, select New Card.

Connect your account, then click Continue. In the Configure tab, choose which board and list you’d like to get notifications for, then test your trigger.
Now it’s time to format the message your bot will send. In a new step, pick Slack as the app and Send Direct Message or Send Channel Message (depending on what you want to happen) as the action event. Connect your account and click Continue.

In the Configure tab, customize what you want your message to say. Remember that you can map fields from your previous Trello step—like the card name, a link to the card, and more—by clicking the + sign or typing a forward slash (/), which opens a modal that lets you select and insert values.

Pro tip: Slack has its own formatting rules for things like links, bolded text, and block quotes. Get to know them so your bot’s messages look clean and consistent.
After you test this step, remember to publish and turn on your Zap.
You can build Slack notification bots for any of the thousands of apps that connect to Zapier—or with any site that uses RSS. Here are a few to get you started:
How to build a Slack slash command bot
Slash command bots wait for a command and then run a workflow. Then can make you a document, find an email address, start a call, log records—you name it.
Start by adding a new app to your Slack account. Go to the Slack API page and click Create an App.

In the pop-up window, choose whether you want to build from scratch or from a manifest—basically, a short text file with JSON or some other structured info that serves as a blueprint for what you want to build.

For simplicity, let’s build from scratch. You’ll be prompted to pick an app name and workspace.

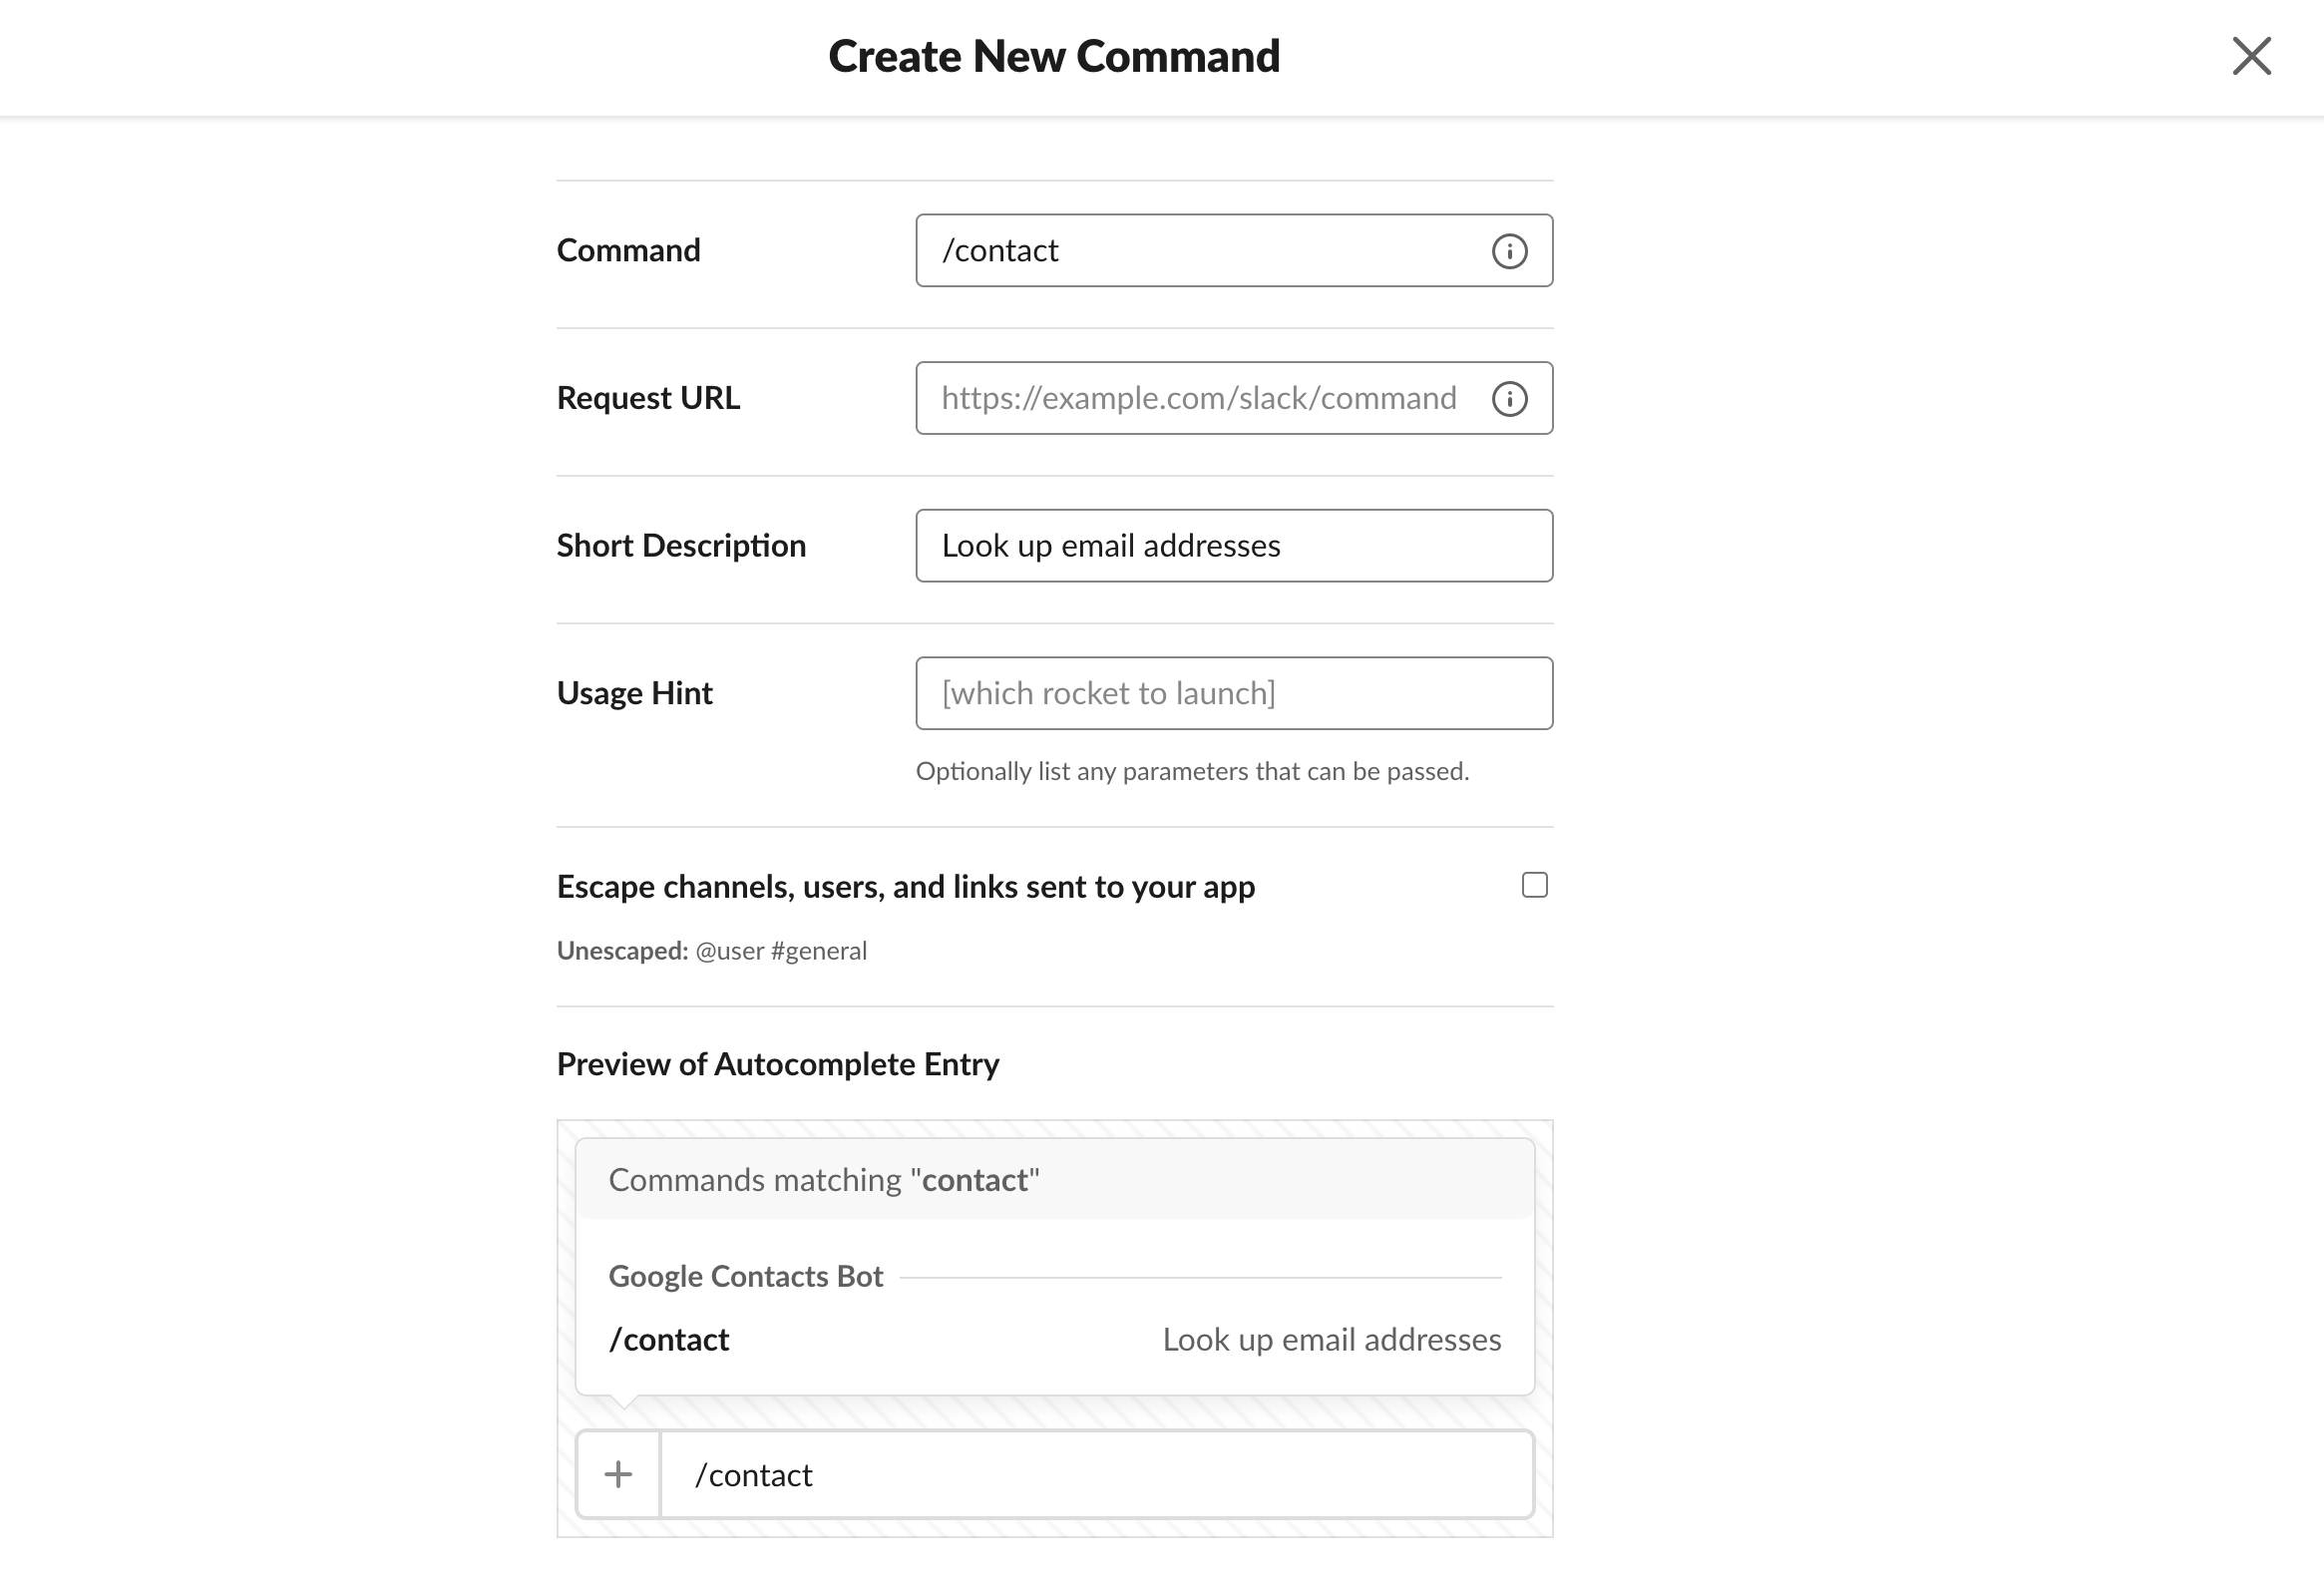
Slack will then show you a bunch of information about your new app. In the left-hand menu, under Features, click Slash Commands. Then click Create New Command.
First, add a command with a slash in front of it—for example, /contact if you want to look up contact info, or /weather to build a weather bot. You can then add a short description and usage hint.

There’s one more field to fill in: Request URL. We’ll grab that URL from Zapier’s webhooks integration.
In a new tab or window, make a new Zap using Zapier’s Webhooks app, and select Catch Hook as the trigger event.

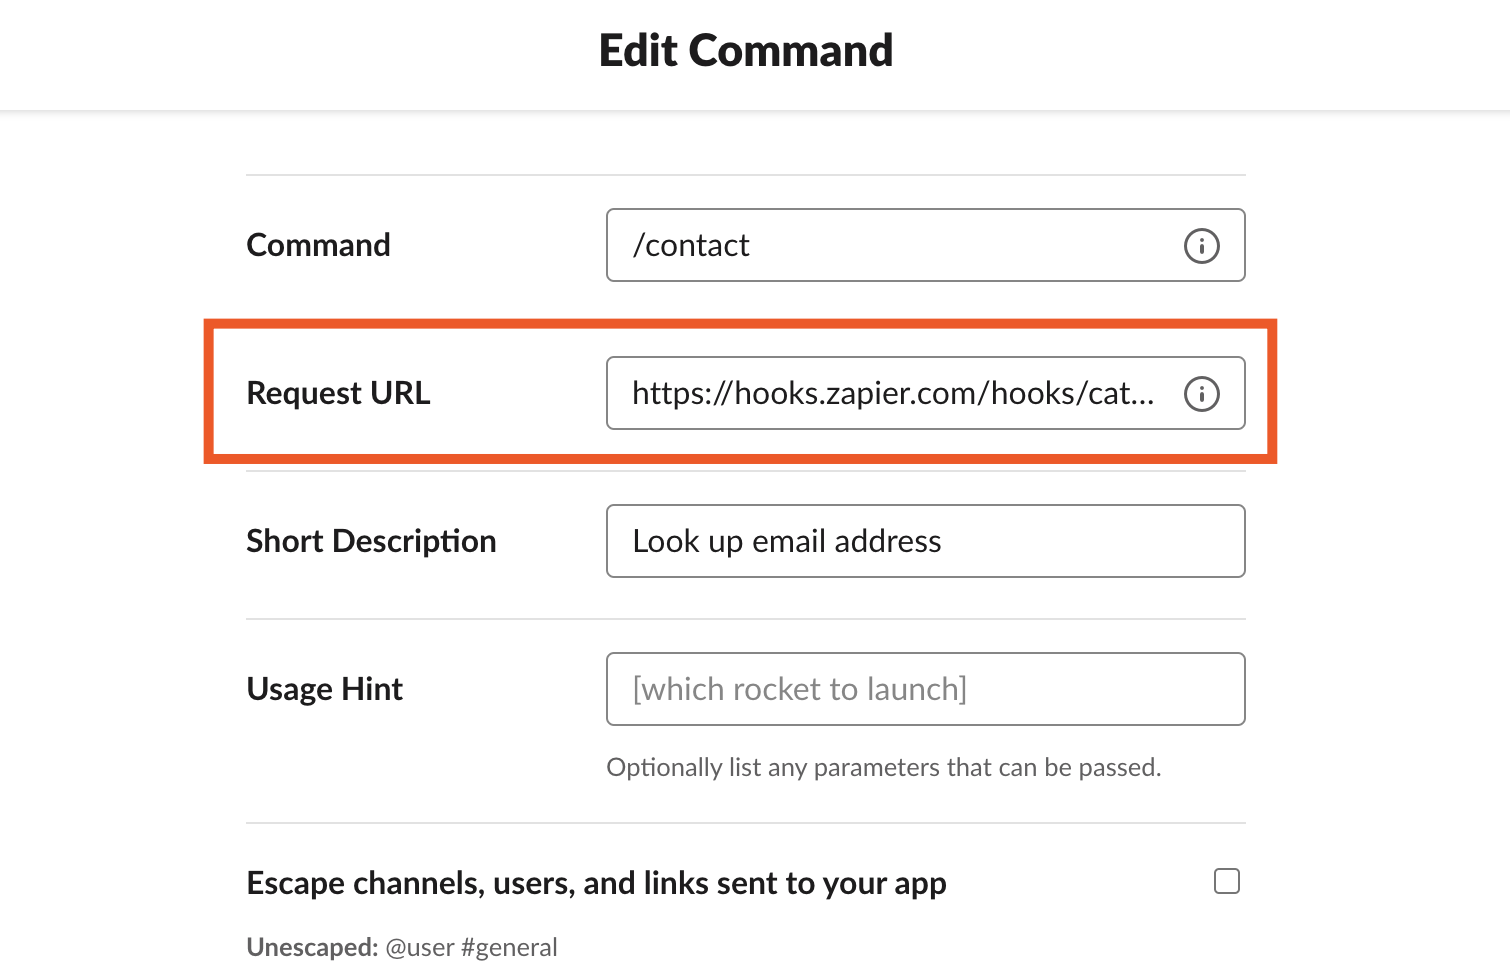
Click Continue twice to reach the Test tab you’ll see your webhook URL. Copy it, and—this is important!—make sure you add silent/ to the end of the URL.

Return to your Slack slash command’s configuration page. In the left-hand menu, paste the whole link (silent/ included) into the Request URL field. Then click Save.

Now it’s time to test your slash command, so you can build out the rest of the Zap. Open Slack, and type your command followed by the text you’d like to use in the bot. I’m building a bot that’ll find contacts in Google Contacts and send me their email address in Slack, so I’ll enter a name that I can use to search Google Contacts.

Back in the Zap editor, add an action after your webhook trigger. For my use case, I’m going to add a Google Contacts step using the Find Contact action event—but you can choose whatever app and action works for you. (For example, maybe you want to add a search step that finds an entry in a spreadsheet, or a contact in a CRM, or a customer from your payment app.)
In the Configure tab, I’m going to set this step up to look for contacts by their email address.

You’ll want to send your result back to you in Slack—so add one more step: a Slack action with Send Channel Message selected as the action event.
Don’t pick a specific Slack channel to post the message to, though. Click the kebab menu (⋮) to the right of the Channel field and choose Custom—then click the + sign or type a forward slash (/) to map that to the channel name from your trigger step.
Now just compose your message. Type whatever you want in the Message Text field, mapping any details you want pulled from previous steps. Then customize the bot, adding the same name and icon image that you added to Slack.
Test the Zap—you should see the response in Slack.

From now on, whenever you need that info—or whatever you built your bot for—just type your slash command followed by the necessary text. Your bot will handle the rest.
How to build a chatbot with your other chat apps
You can use Zapier to build notification bots in any of the tools you use to get work done. Just connect the app you’d like to be notified about (like your CRM, support ticket tool, or to-do list app) to the team chat app where you’d like to receive notifications (like Discord, Microsoft Teams, or Google Chat). Here are a few popular ways to build your own chatbot:
Get notifications for tasks
Get notifications for leads
Get notifications for meetings and events
Deploy an automated Slack bot in minutes
These are just a few examples of Slackbots you could create. Want to know when team members are on call? Or when your co-workers are out of the office? You’re only limited by your imagination—so head on over to the Zap editor to start building the perfect bot for your team.
The original version of this article was published in March 2018 by Matthew Guay. It was most recently updated in November 2025 by Steph Spector.