As an IT professional, you’re tasked with safeguarding your business from any tech disasters. That could include security breaches, fraud, or troubleshooting for your coworkers. Usually, your IT or security team will have an on-call schedule to deal with those requests, so there’s always someone available to help.
Those on-call shifts can sneak up on you though, especially if you’re in the midst of projects. Without a reliable system in place, it’s easy for security issues to slip through the cracks and put your whole business at risk.
Fortunately with Zapier, you can build, deploy, and scale AI-powered agents that handle recurring tasks in the background automatically. In this article, we’ll show you how to build an agent that:
-
Checks the rotation schedule in Google Calendar each morning to see the day’s on-call teammate
-
Verifies the teammate’s availability and finds a replacement if they’re marked as out of office
-
Notifies the available teammate in Slack and creates a corresponding calendar event
Zapier is the most connected AI orchestration platform—integrating with thousands of apps from partners like Google, Salesforce, and Microsoft. Use interfaces, data tables, and logic to build secure, automated, AI-powered systems for your business-critical workflows across your organization’s technology stack. Learn more.
Table of contents
Before you begin
Make sure your team’s on-call rotation schedule is clearly set up in your Google Calendar. The agent will rely on calendar events to determine who’s next in line for on-call duty, so your events need to be accurately titled and consistently scheduled.
To set up a new calendar, open your Google Calendar. On the left, click Other calendars, then the + icon, then Create new calendar. Give it a name and a description, then click Create calendar.
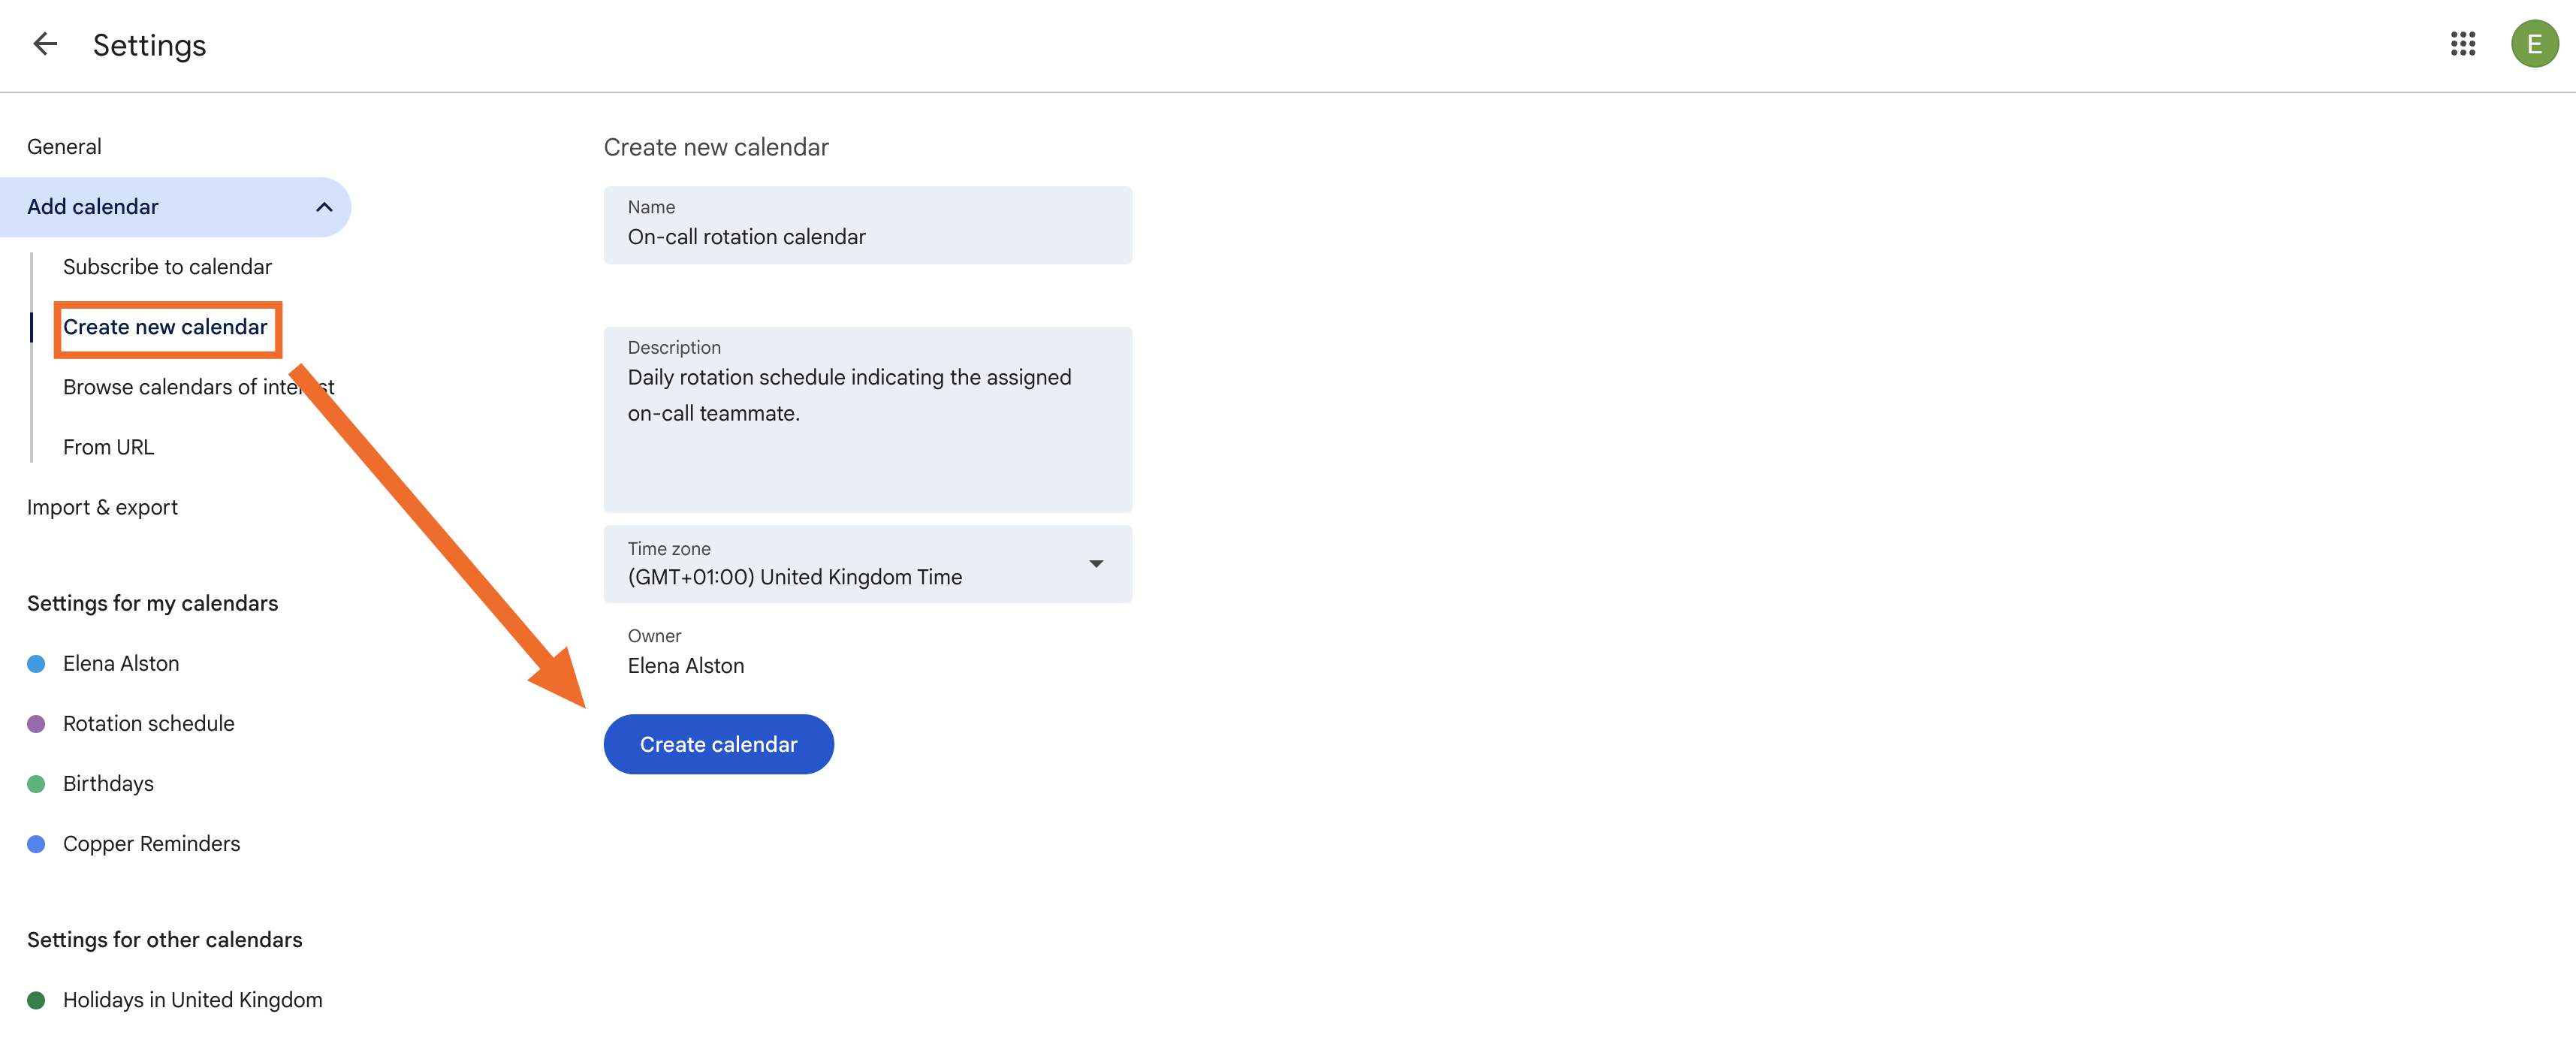
You’ll also need a predefined list of teammates for your rotation. Ideally, have their calendars up to date with any planned out-of-office events, so the agent can easily spot when someone isn’t available.
Finally, make sure you have a dedicated Slack channel you’ll use for on-call notifications. That way, your agent can promptly alert the right teammate when they’re scheduled for on-call duty.

How to set up an on-call agent
Get started by clicking on the button below, then clicking Use Template in the pop-up window.
In the new portal, you can customize your agent’s set up. Your agent will include the following:
-
Trigger: An event that prompts your agent to take action. You can trigger events on a schedule or when something happens in another app.
-
Instructions: What you want the agent to do.
-
Tools: Apps, functions (like web search), and data sources the agent will use to perform tasks.
Next, you’ll need to connect the action apps your agent needs to do its job.
Connect your Google Calendar account (where the agent checks and updates the on-call schedule) and your Slack account (where it sends the daily notification to your team).
When you’ve connected those accounts, click Create.
You’ll be brought to the configuration page. In the left-hand panel you can set up or change the agent’s trigger, personalize the instructions, and configure any apps that perform actions. In the right-hand preview panel you can test your agent’s performance.
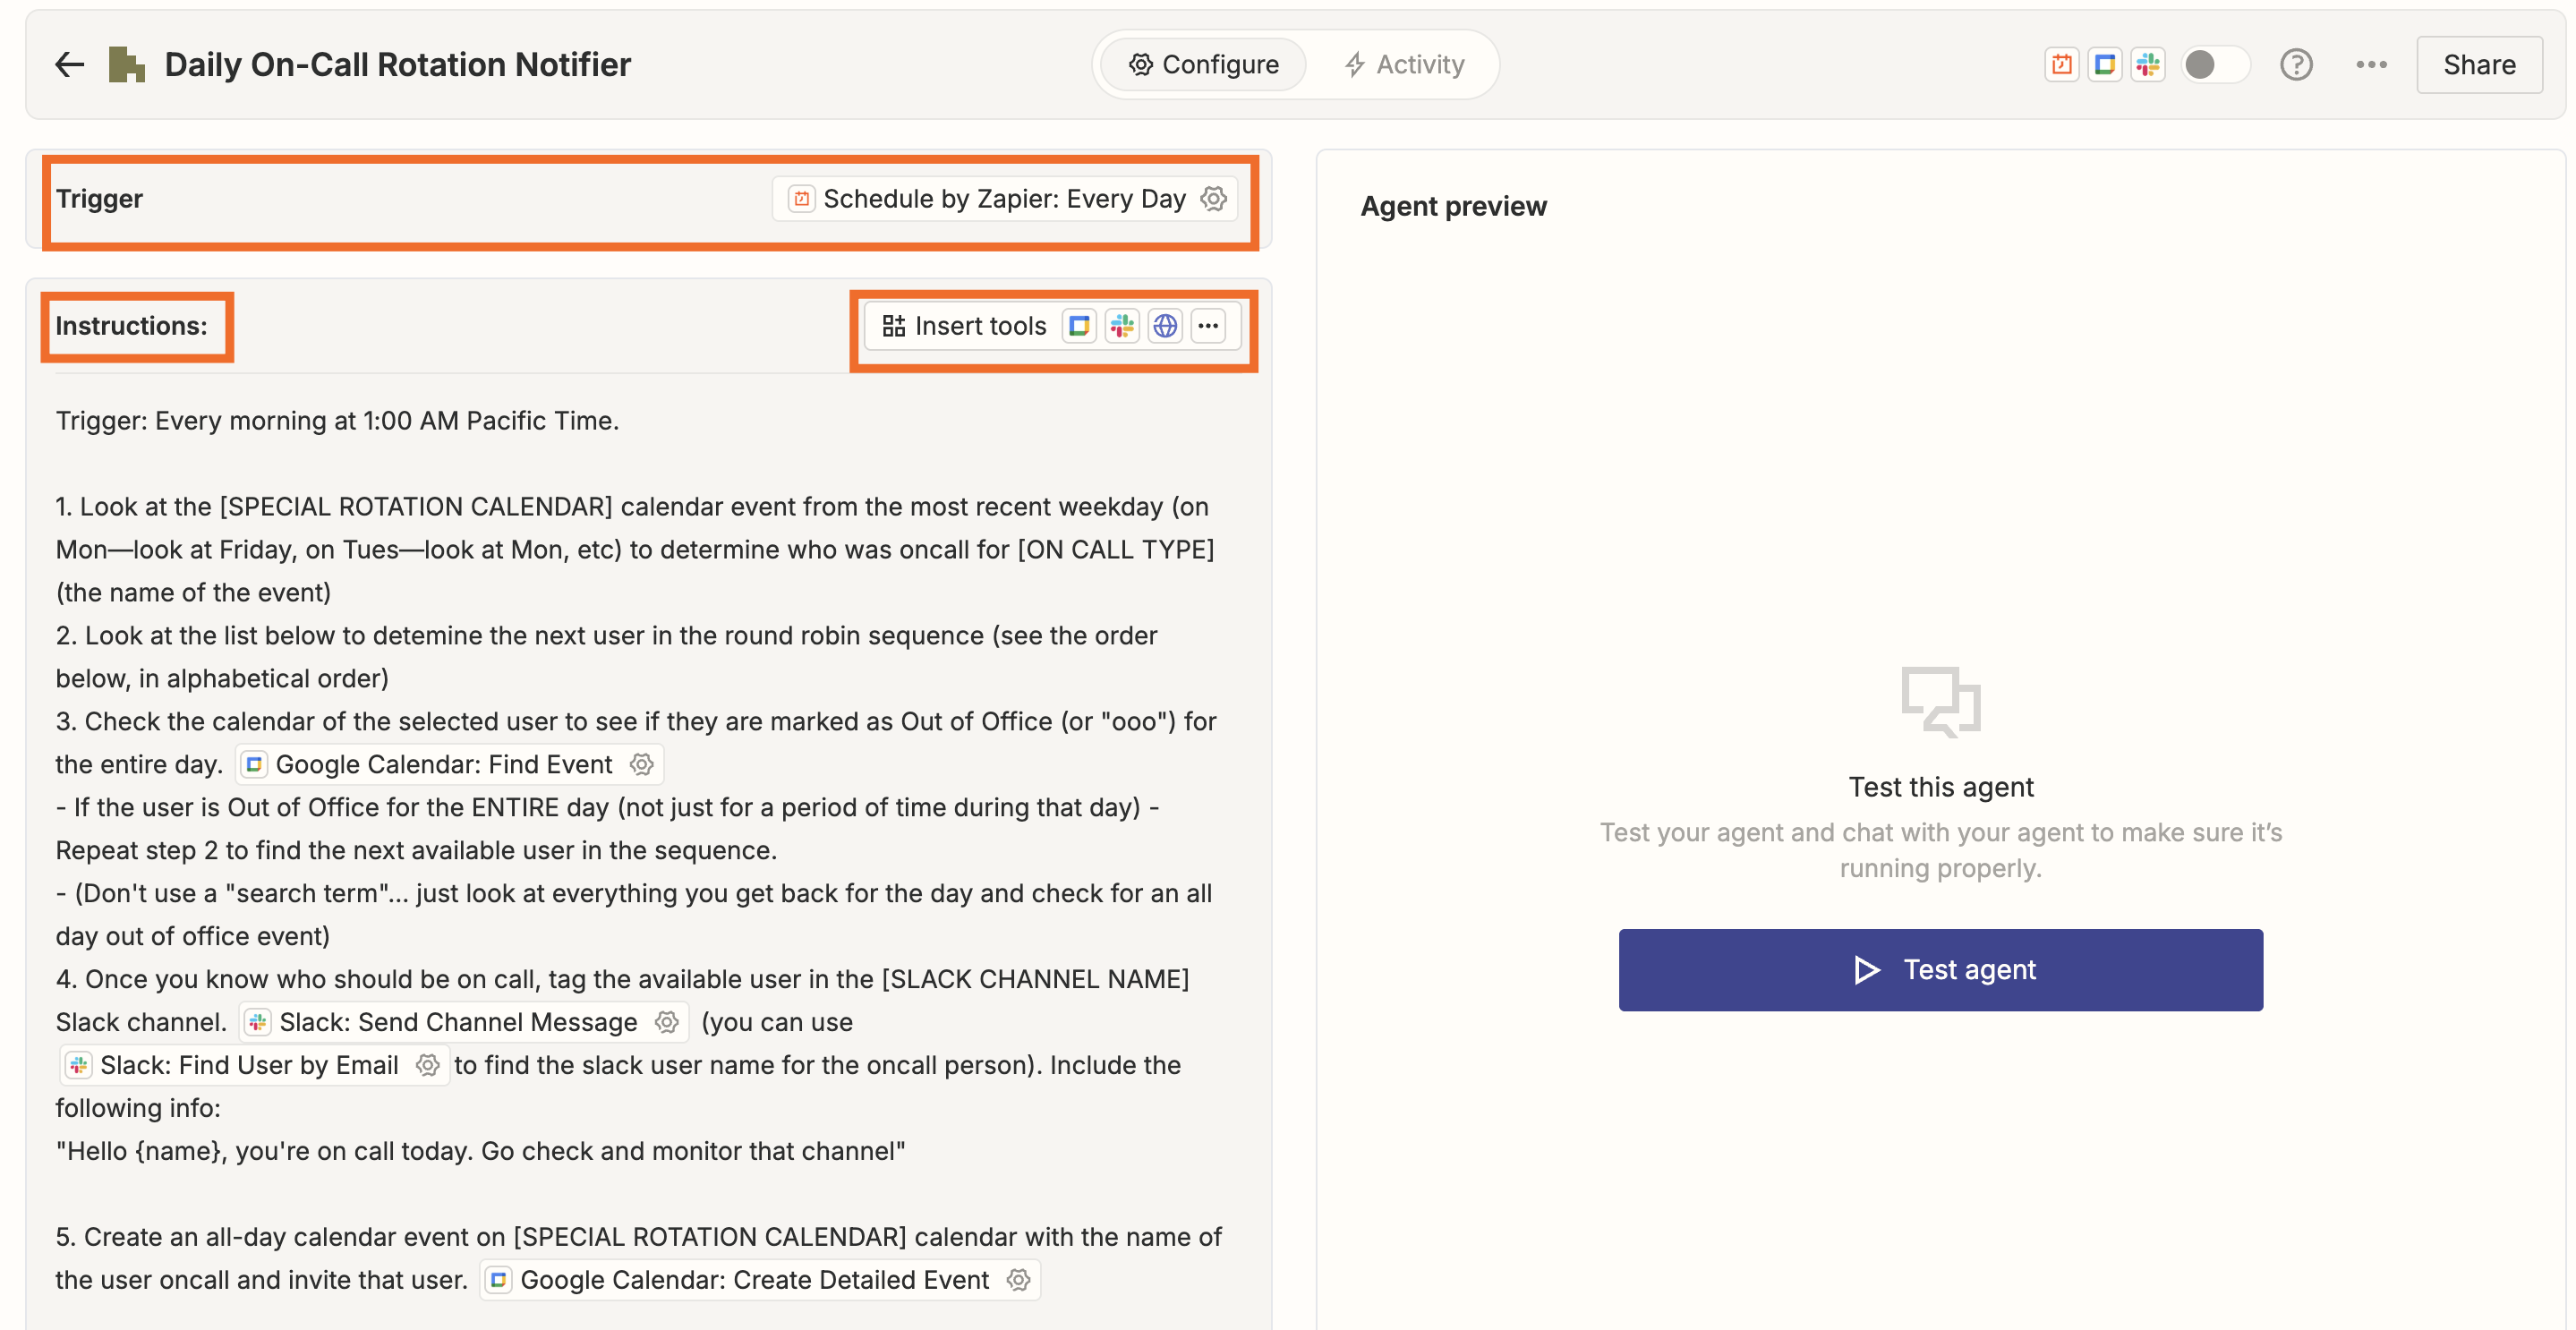
You’ll see that this agent comes with pre-made instructions, which we can customize in the next step.
Set up your agent’s instructions
Let’s focus on the left-hand panel of your configuration page. Click on the trigger step to customize when your agent is triggered. The template uses Schedule by Zapier to trigger every day at 6:00 a.m., but you can change it to trigger hourly, daily, weekly, or monthly—at whatever time works for you. Click Save once you’re done.
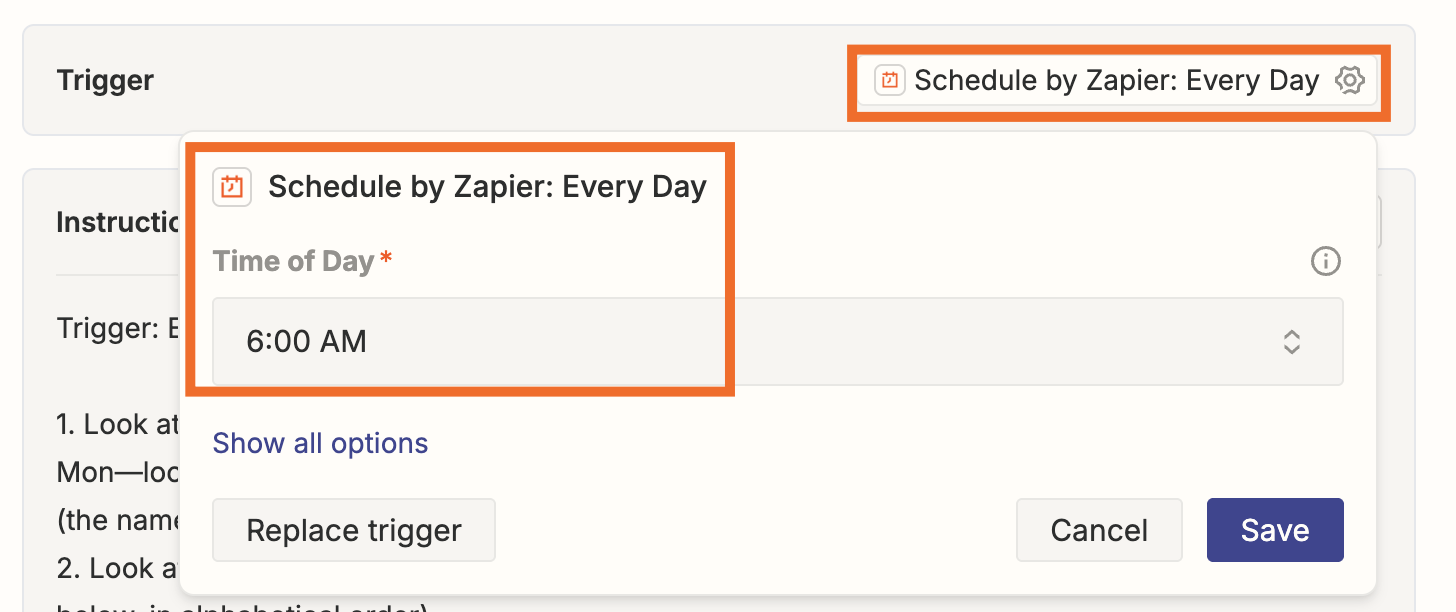
Next, it’s time to customize the agent’s instructions.
Under Instructions, you’ll see the default criteria we’ve included for identifying and notifying on-call teammates.
These criteria include checking the most recent weekday’s event from your rotation calendar, determining the next person in line, verifying their availability, and notifying them in Slack. If someone’s marked as out of office, the agent moves down the list until it finds an available teammate—then creates a calendar event for that person.
You can use these instructions exactly as they are or customize them based on your team’s specific needs.
For example, you might adjust the calendar name, change how availability is checked, or customize the Slack message that notifies teammates when they’re on call. Simply type directly in the panel to edit the instructions—your agent will follow whatever parameters you set.
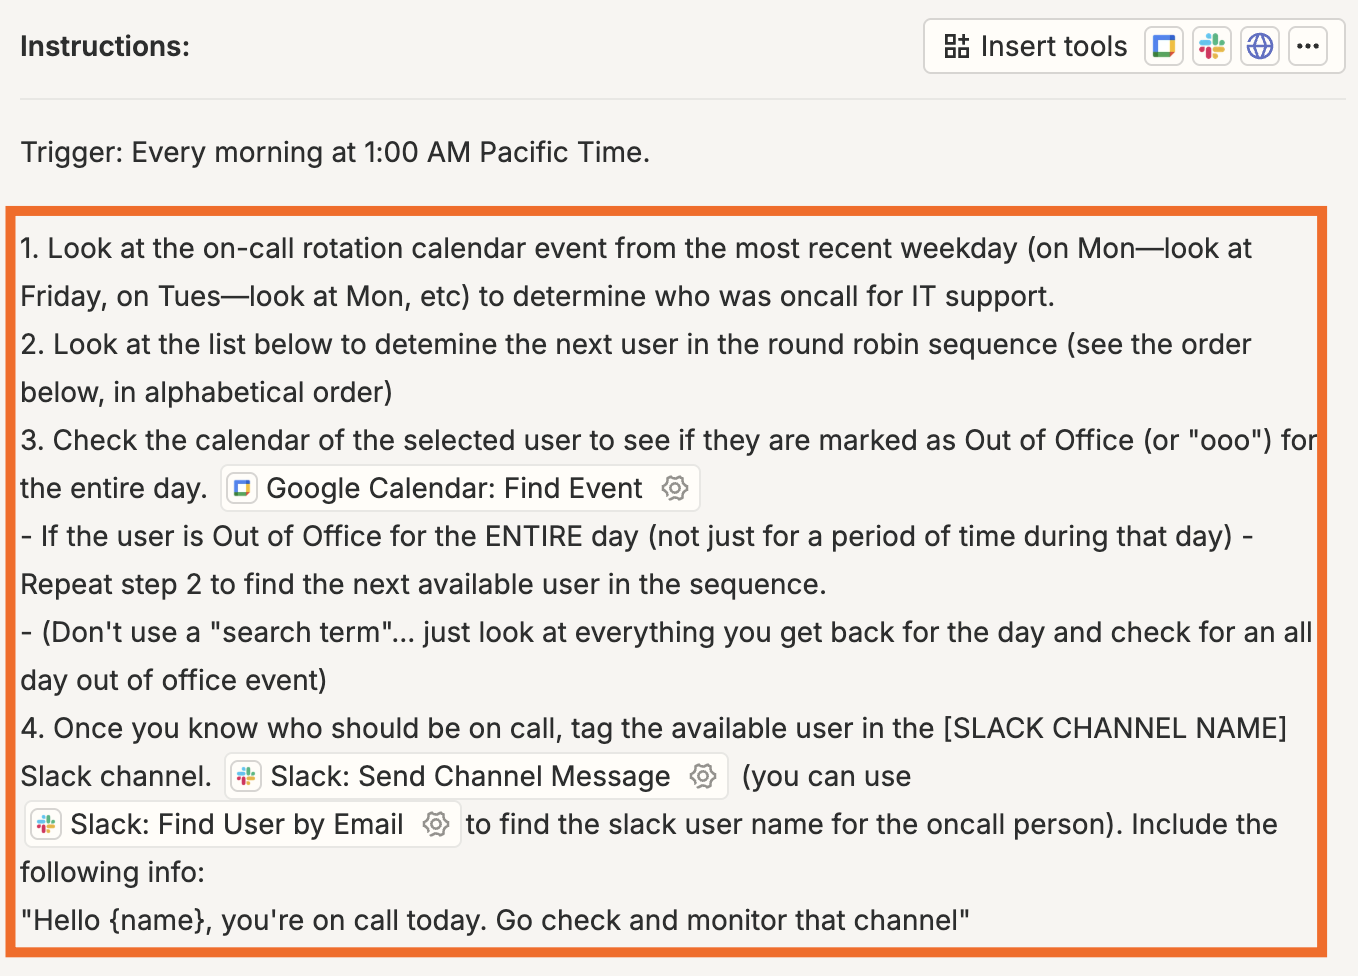
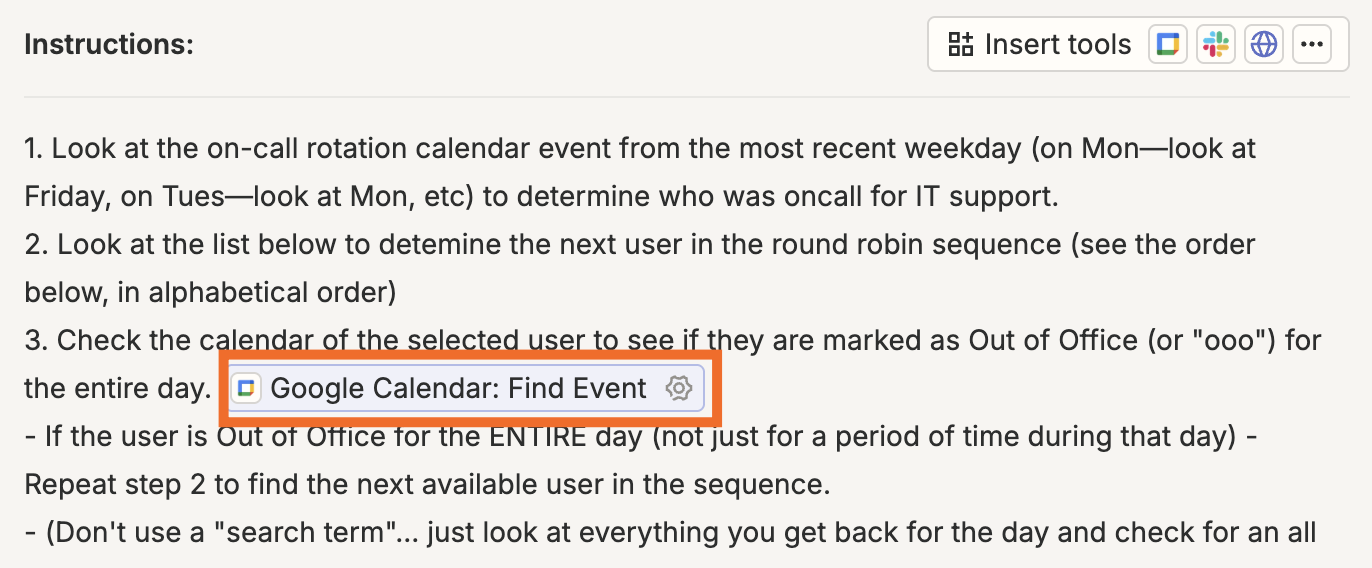
The rotation order is defined directly in the Instructions panel, so be sure to add your team’s list there in the exact sequence you’d like the agent to follow. You should also add their Slack IDs so the agent knows who to tag and notify in Slack. Here’s how that might look:

Configure your action apps
Once you’ve fine-tuned the instructions, you can now focus on the tools your agent needs to do its job. That will include configuring the specific app actions (Google Calendar and Slack) included in your Instructions panel.
Start by customizing the first Google Calendar action. This step checks your team’s rotation calendar to determine who was last on call.
Click the Google Calendar: Find Event pill in your Instructions panel.
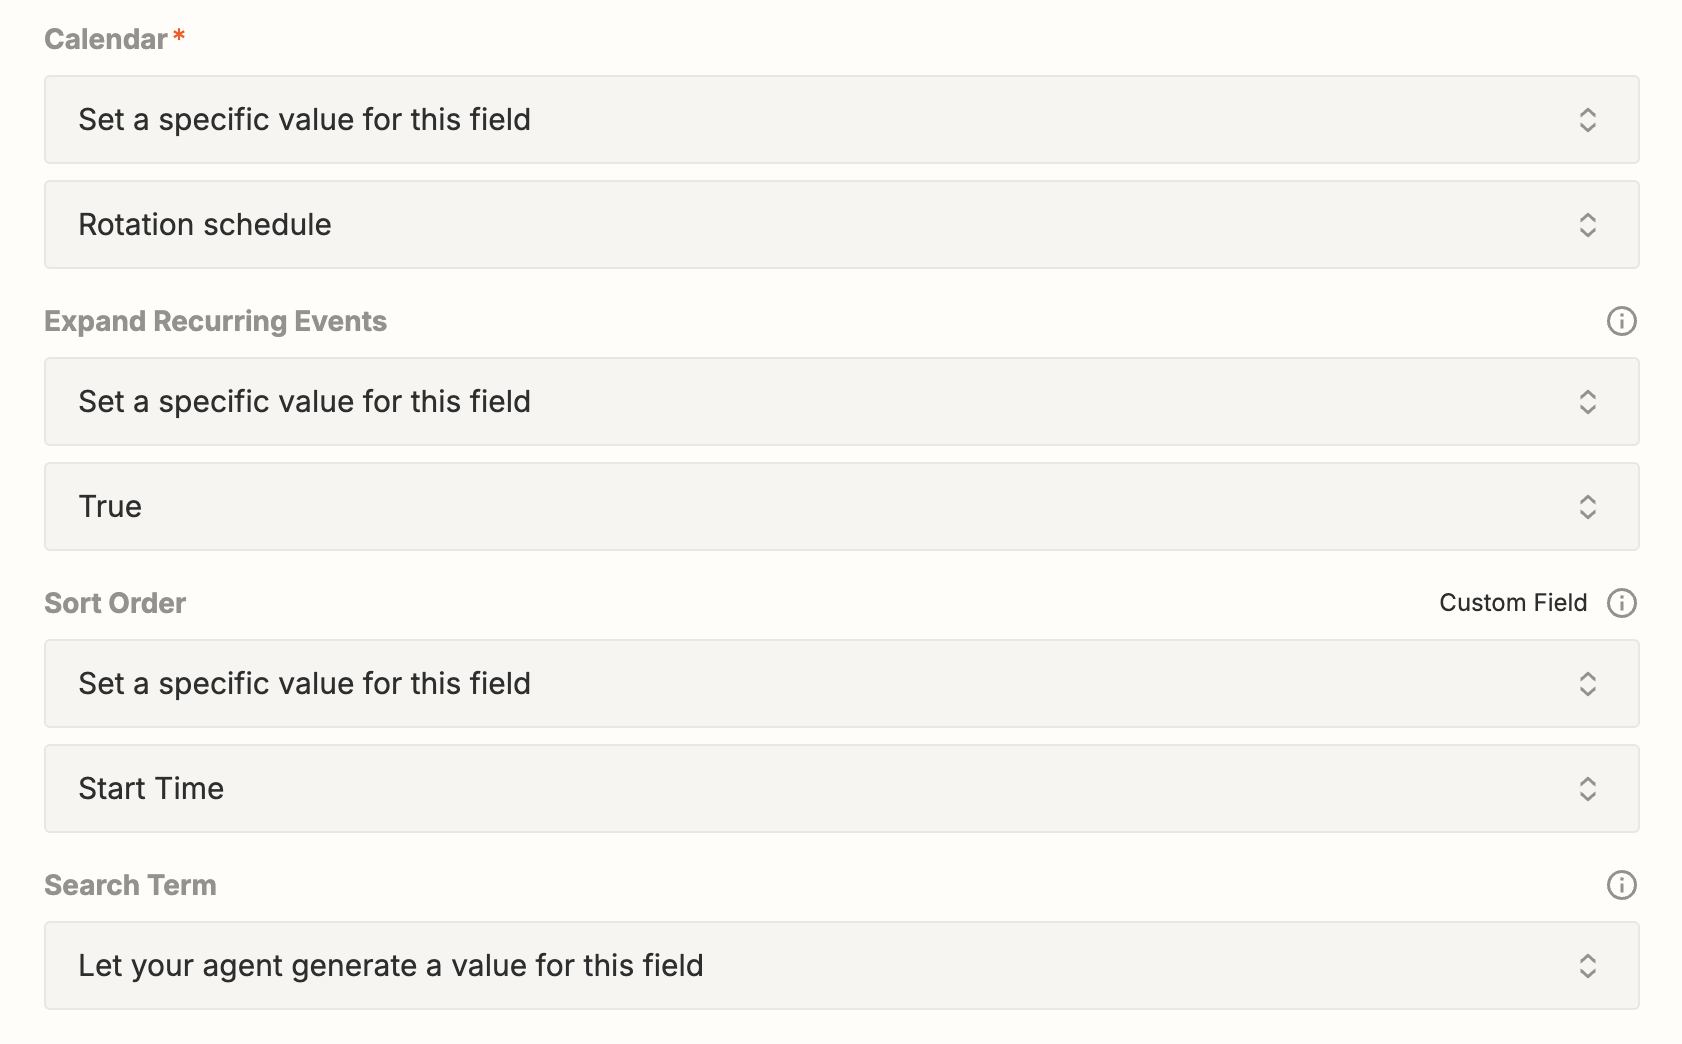
Under Calendar, choose Set a specific value for this field, then select the rotation calendar you set up previously.

Under Expand Recurring Events, select True so the agent can see individual events in any recurring series—like last Friday’s on-call shift. Under Sort Order, choose Start Time so the agent reviews events chronologically. You can leave the Search Term field set to Let your agent generate a value for this field. There’s no need to provide a keyword, since the agent will review all events for that day and identify the on-call teammate automatically.
Then, click Save.
Next, let’s customize your Slack action. This step sends a daily message to the selected teammate, tagging them in a Slack channel and letting them know they’re on call.
Click the Slack: Send Channel Message pill in your Instructions panel.

Under Channel, choose Set a specific value for this field, then select the Slack channel where you want the message to be posted.
Once you’ve selected the right Slack channel, you can either set specific values for the rest of the fields or allow your agent to generate values every time. In our example, we’re going to allow the agent to choose based on the information already provided in the instructions (like the notification text it should send teammates on call, for example).
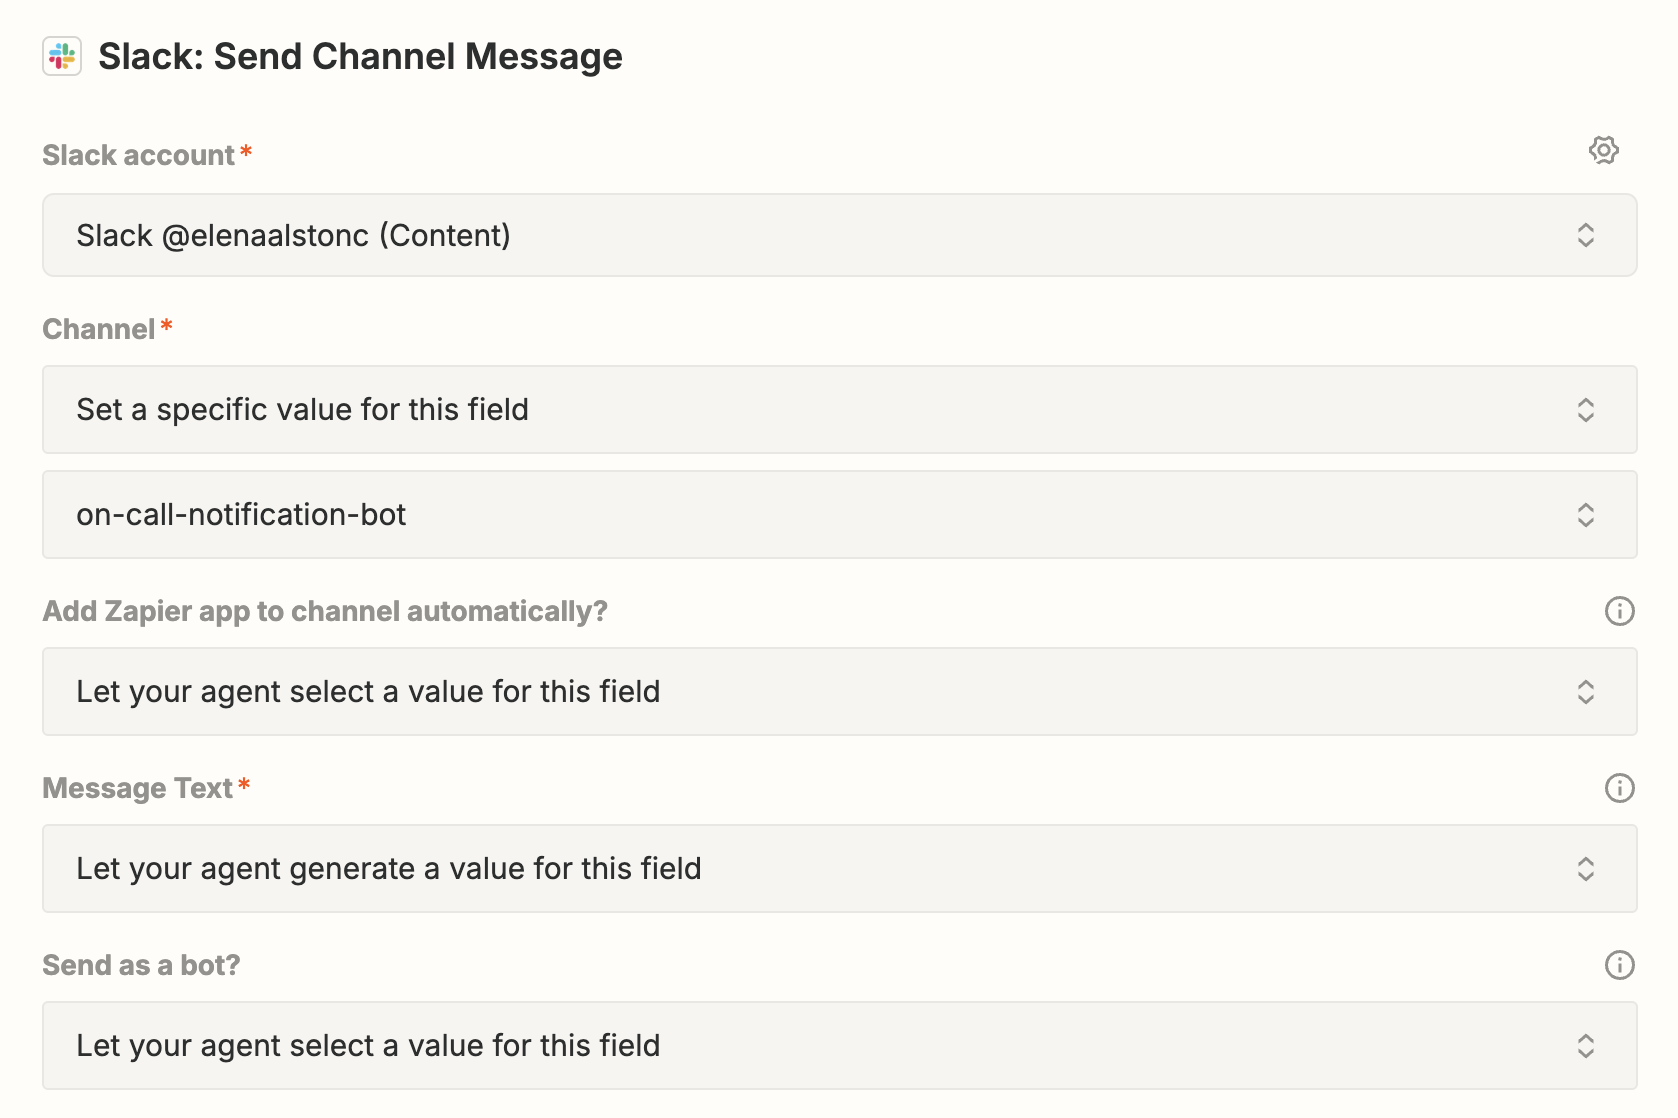
Once you’ve finished configuring your Slack action, click Save.
Finally, let’s configure your final Google Calendar event (create event). You’ll need to specify which account and calendar event your agent should add your teammate to (your rotation schedule). You’ll also choose how your agent fills in fields like calendar summary, description, location, and start and end times.
Like before, click the Google Calendar pill within your instructions, and select Set a specific value for this field under Google Calendar account and Calendar. Once you’ve selected the right calendar and schedule, you can either set specific values for the rest of the fields or allow your agent to generate values every time.
In our example, we’re going to allow the agent to choose based on the list of teammates it’s chosen from.
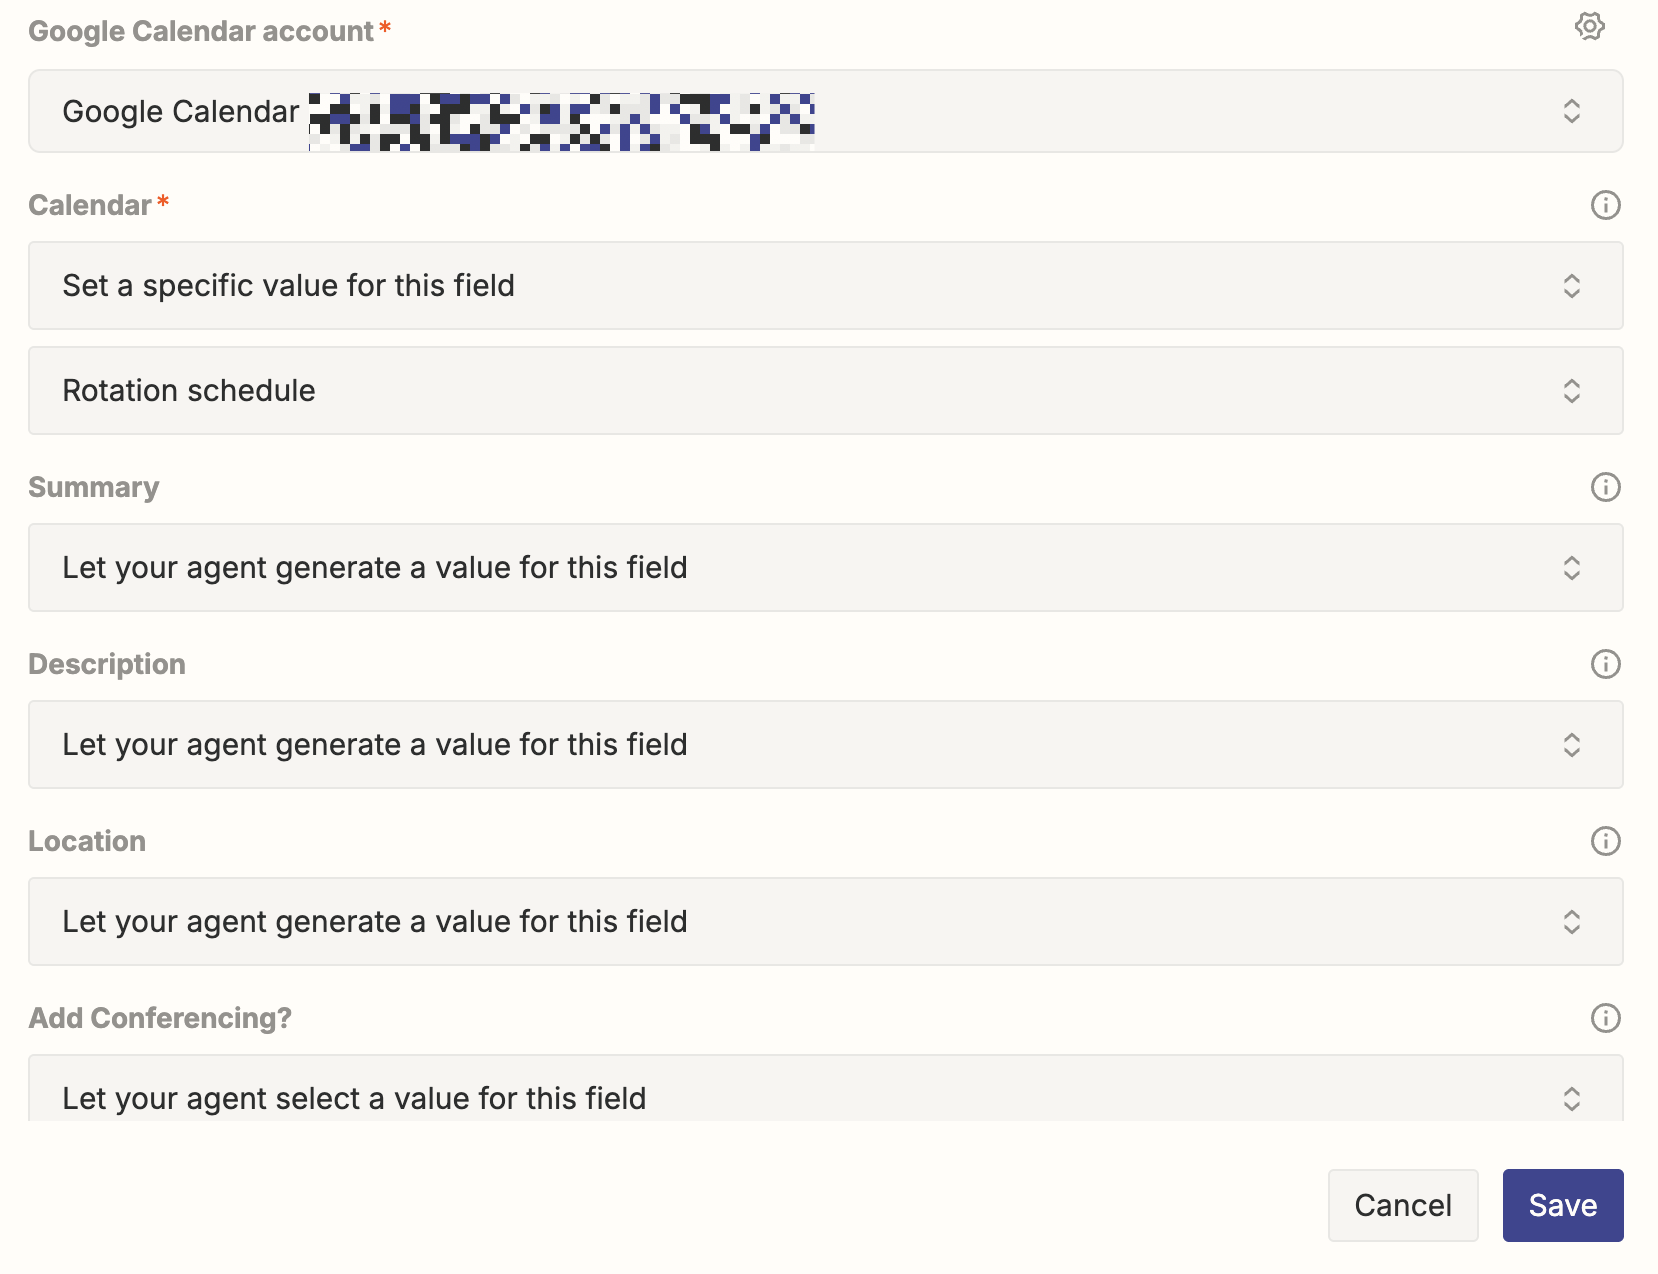
Finally, click Save.
Test and turn on your agent
Now it’s time to test your agent’s performance in the preview panel on the right-hand side. Click Test agent.
Your agent will now test each action you’ve set up. This lets you see what’s working and highlights any areas where you might need to adjust your instructions or action apps. At every step of the way, you can approve the action or further finesse your instructions by chatting with the agent directly in the preview panel.
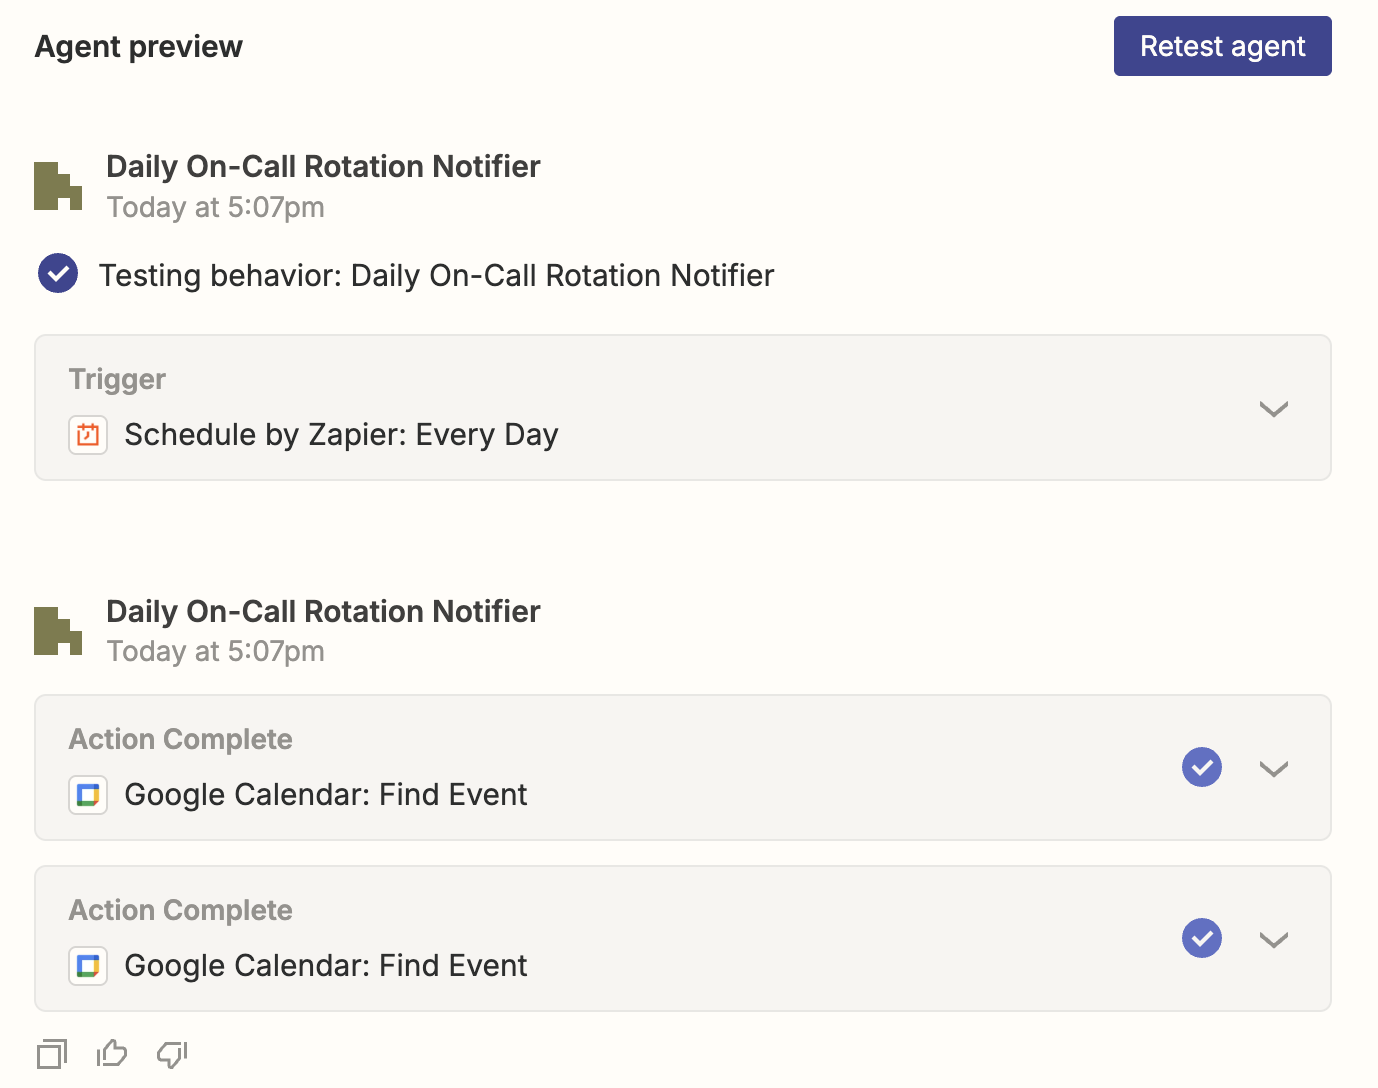
For example, here’s a successful test of our Slack action:

Finally, if everything looks good, you can turn on your agent by switching on the toggle in the top right corner of your screen.

Once your agent is up and running, you can check the agent’s activity dashboard by clicking on the Activity panel at the top of your screen.
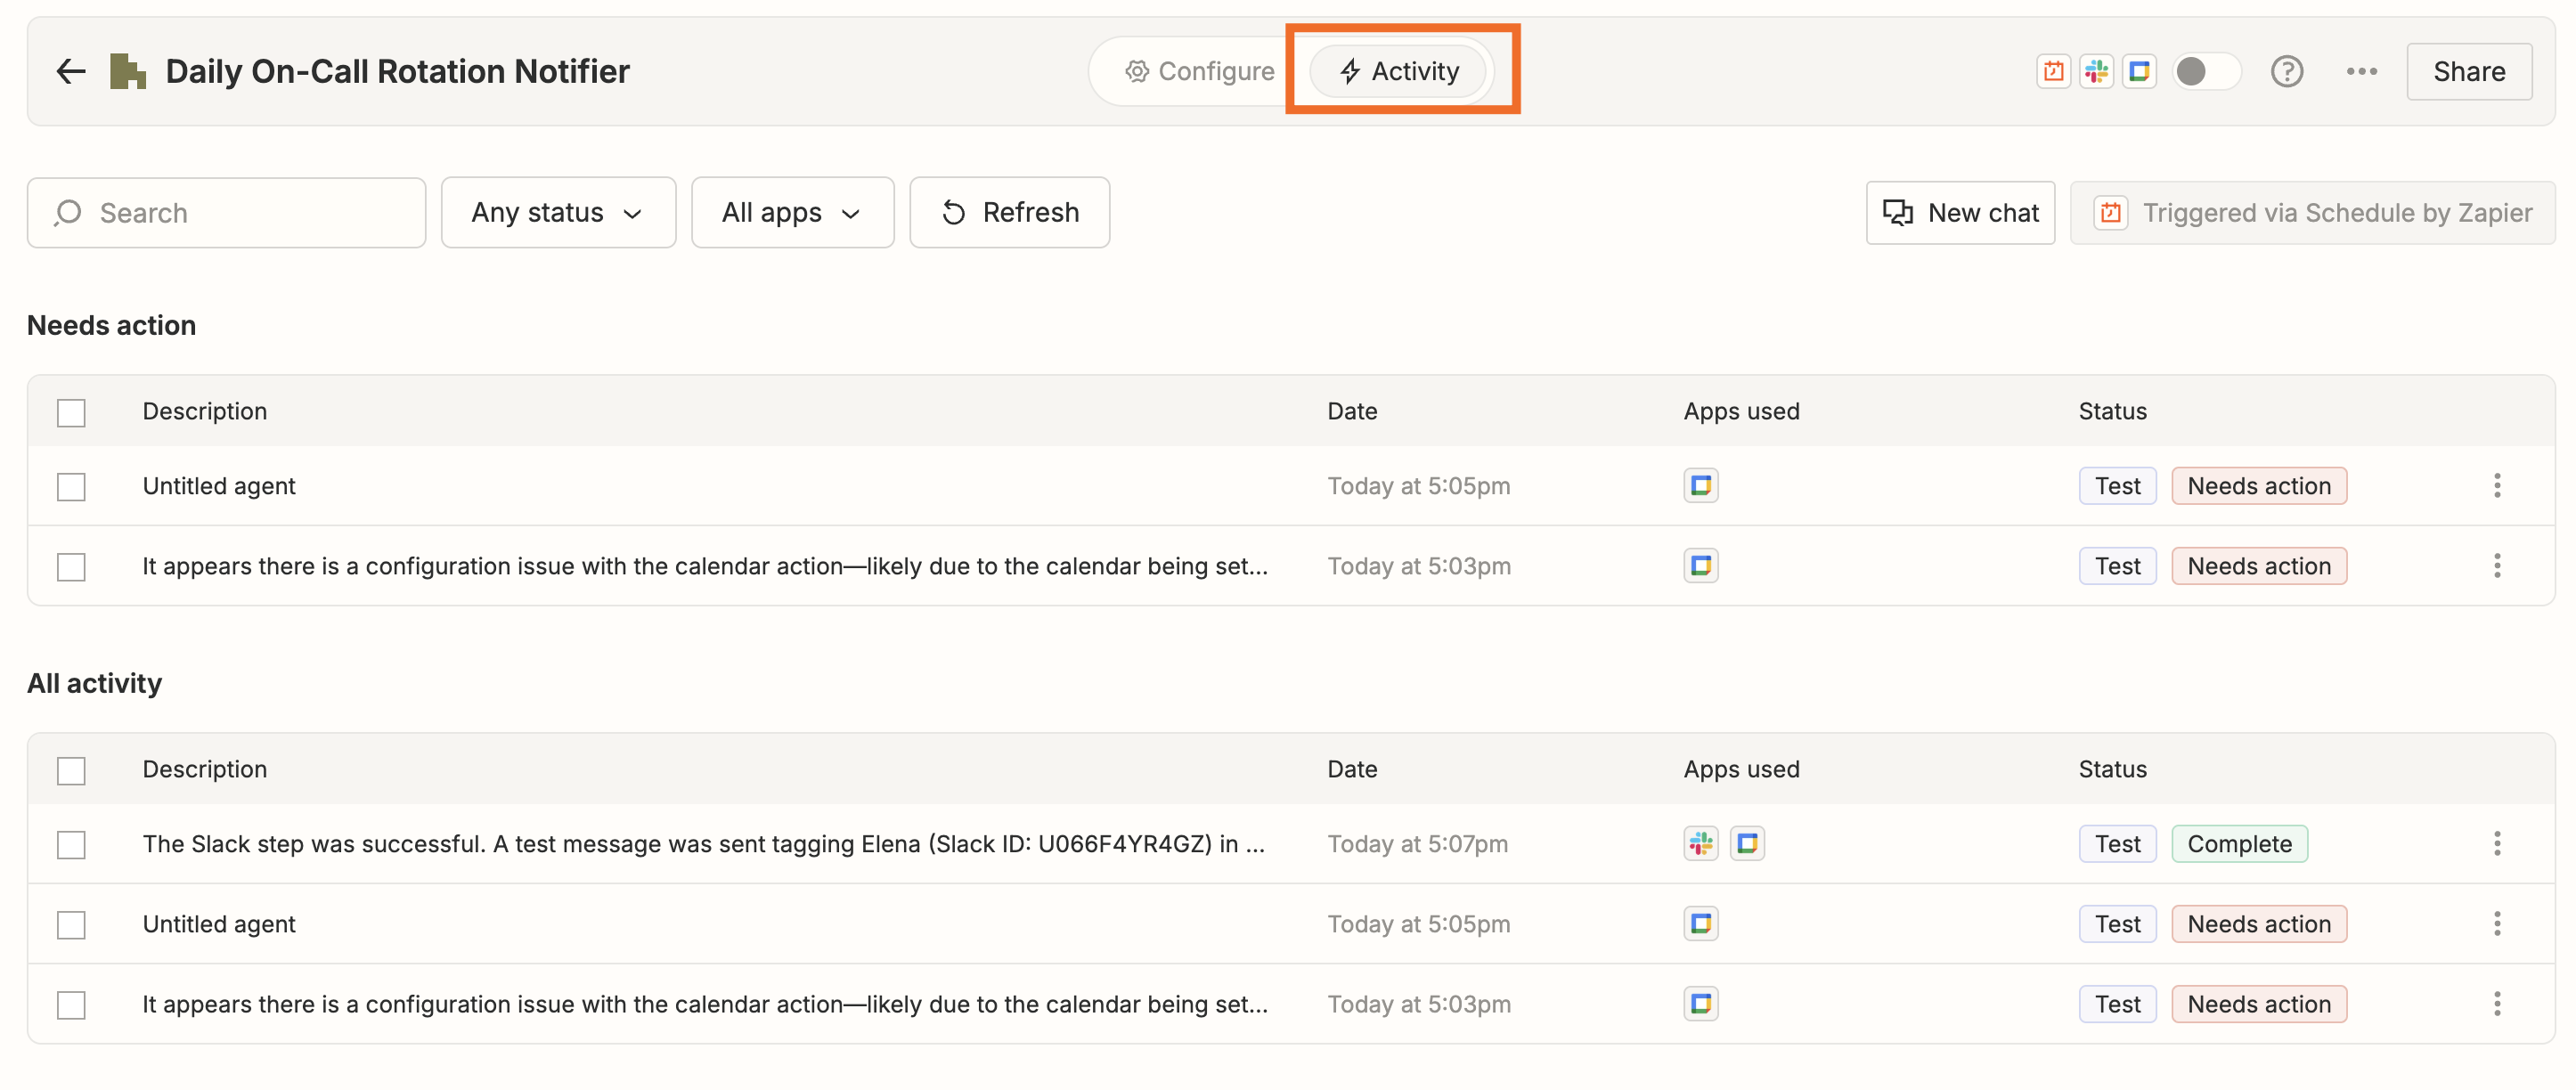
This gives you complete visibility over your agent’s work so you can see what it accomplishes and when it needs your input. For example, you can access an activity log with detailed information about each run, monitor when an agent needs your attention, and more.
Power your security teams with Zapier Agents
With this on-call notification agent, you can hand off the daily admin work of managing your rotation schedule, checking availability, and sending reminders. Your team stays informed, your Slack stays updated, and no one’s left wondering who’s on call. And because it’s built with Zapier Agents, it runs quietly in the background every day.
It’s one less thing for your IT and security teams to worry about, so you can stay focused on what really matters: keeping your systems (and coworkers) running smoothly.
Get started with agents today and see what you can build.
This article was originally published in May 2022, written by Krystina Martinez. It was most recently updated in July 2025 by Elena Alston.